Building my Door!
Well this has been an emotional rollercoaster. It ended so well
but started so badly. I felt really apprehensive about building my door in
Maya, I could barely build the companion cube (at the time!) and felt even
worse about building a game engine ready door. However, with a few tips and
help starting I managed to create the door itself! It was full on from there
on.
I have built the whole door so this blog post may seem long and
overdue. Never mind, at least it’s done!
As I had help with the door itself I haven't got any screen shots to show the
progression or explain what I did. However, I can pretty much do a talk/type
through and an image so it makes more sense.
I also don’t have enough time to post all the door component
walkthroughs right now so I will just do the door and pillars for now.
The Door
Front View
Side View
Semi Birds Eye View/ Side
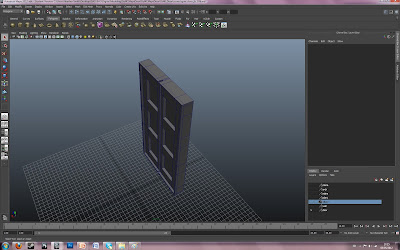
1: I started off with a cube which I scaled up to create half the
door (later to be duplicated into the other half of the door). I then used a
series of extrudes and bevels to create the large squares inserts you see on
the door front as well as the outer edge/rim of the chunky Greek door. Simple
really but I just couldn’t get it started! This way mark showed me though
(making half the door then duplicating it) worked great, this way (if I wanted
too) I could animate the door opening and it would have a realistic
crack/opening down the centre of the door. The geometry is also very tidy.
The Pillars
These I am very proud of, I made them all on my own. Will try
to keep the explanation as brief as possible.
1: Started with a standard cube from the polygon shelf and scaled
it to the required size. Using extrude and bevel, I was able to create the
shape you see below. By making the quantities minus, I was able to bring the
face out and achieve the desired shape.
2: Here I carried on extruding, bevelling and offsetting the same
cube to keep bringing it upwards so that it created the base of the pillars.
3: This bit is pretty self explanatory/the same. I offset the top
of the base section and then extruded it to create the first block section you
see below. I then offset each of the sides and extruded them inwards to create
the desired effect.
4: Still using the extrude tool I was able to select the whole top
face of the new pillar section and offset it so that it came out at an angle
from the pillar to create the right shape.
5: Rinse and repeat again, I was able to use the extrude tool,
still all on the same shape for efficiency, and literally offset it to the
desired amount to create the main/long pillar section of the design. To add the
extruded inward faces like the smaller section below on the pillar I had to
insert some edge loops/interactive split tool around the entire pillar mesh and
ensure they were correctly spaced out and even so that I could then select the
face and extrude it in. For some reason I couldn’t re sue the extrude tool to
offset the faces equally.
6: I kept extruding until I eventually redesigned the pillar, not
much but fairly drastically. I changed the top part to a more flat and square
shape (ready for the arch). This you can see below. I also decided the design
looked silly against the wall because it stuck out and this also looked wrong
with the arch. This is when I decided that I wanted the extruded angles at the
front of the pillar but the back needed to be flat against the wall. I used the
boolean tool to do this.
7: Boolean is an easy way to cut out desired shapes in Maya. It
has 3 different options to achieve the shape you want. It usually (as I have
found out many a time since) works on fairly simple geometry. It took a few
attempts for it to work on my pillar which was frustrating! Eventually I got
it, I have no idea why, I guess Maya felt sorry for me?
8: I created a fresh cube from the shelf and sized it so that it
fit directly over the back of the pillar to ensure it gave a flat edge. I then
used the boolean tool and used it with the “difference” option (so that it cuts
away anything inside the new shape has been put on top of it).
Final outcome from behind after boolean
Final outcome/final pillar design from a front/semi side angle (I duplicated the pillar I made to create 2)


No comments:
Post a Comment