Monday, 22 April 2013

BA6 | Specialism #13


Un Wrapping the UV’s for the Pillars

I am hoping these pillars will be slightly less of a headache to un wrap compared to the rope *sigh*.  As my tutor, Lothar, advised me last term when tackling UV un wrapping I will be selecting obviously groups of faces on the model which share the same axis and I can planar map them to that axis. LETS DO THIS >:)

I started by selecting the faces that all faced the same axis down the side of the pillar (I did this on both sides). 


I then manipulated the UV’s on the editor so that the checker pattern on the pillar had perfect squares and didn’t stretch.  

 
I proceeded to doing this for the other sides of the pillar and ensuring that the UV’s matched on the editor but also making sure that the checker pattern was as similar as I could achieve.

 
The same process was taken when I mapped the smaller “ledge” parts (that I bevelled during modeling).  I did all the faces that faced upwards first then did the same with the ones that aced down. 
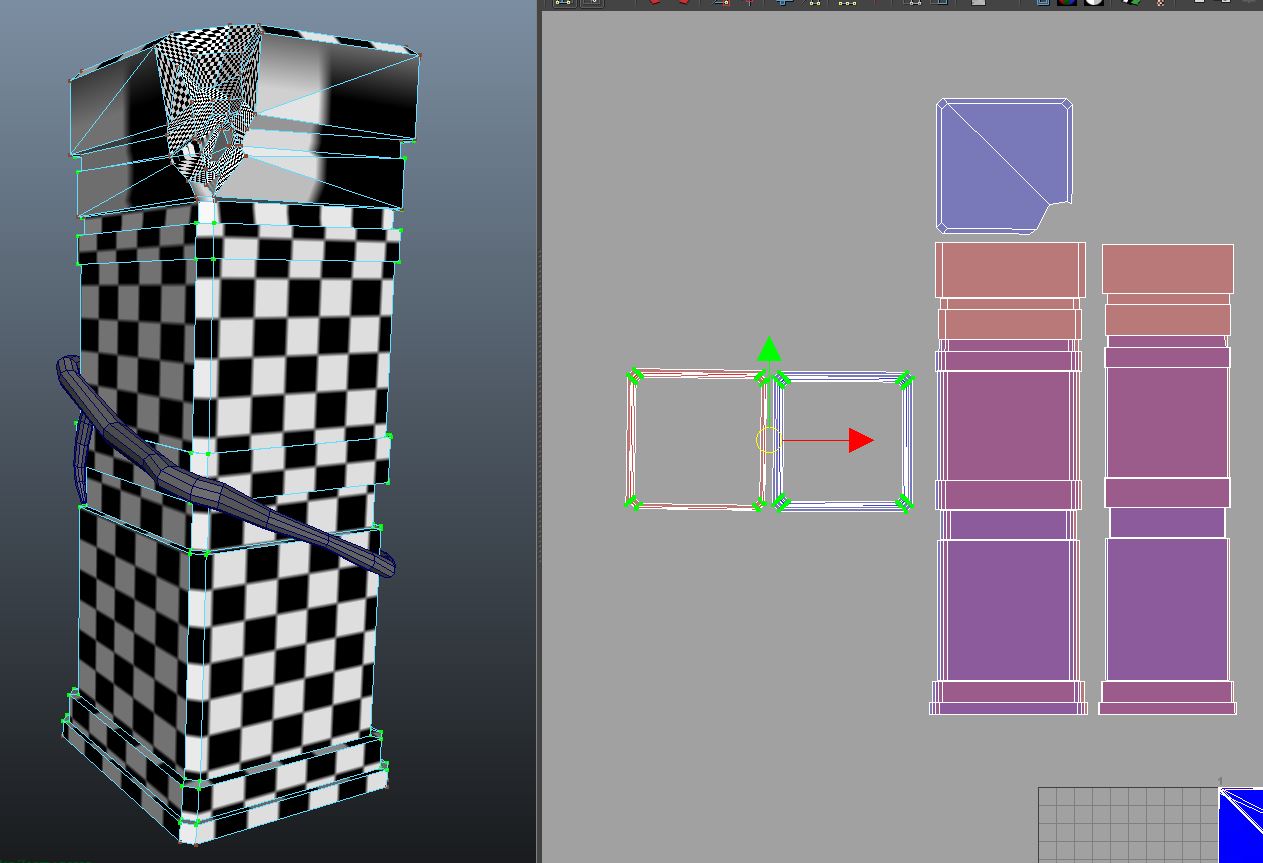
 
Now to tackle modeling the most organic part of the model, the cracked area at the top. I began by trying a simple face select and axis projection on the sides at the top, this worked fine so that’s nice :P I took this screen cap before I manipulated the uv map, I made sure the checker pattern was more square than it appears here so that it marched the rest of the pillar.


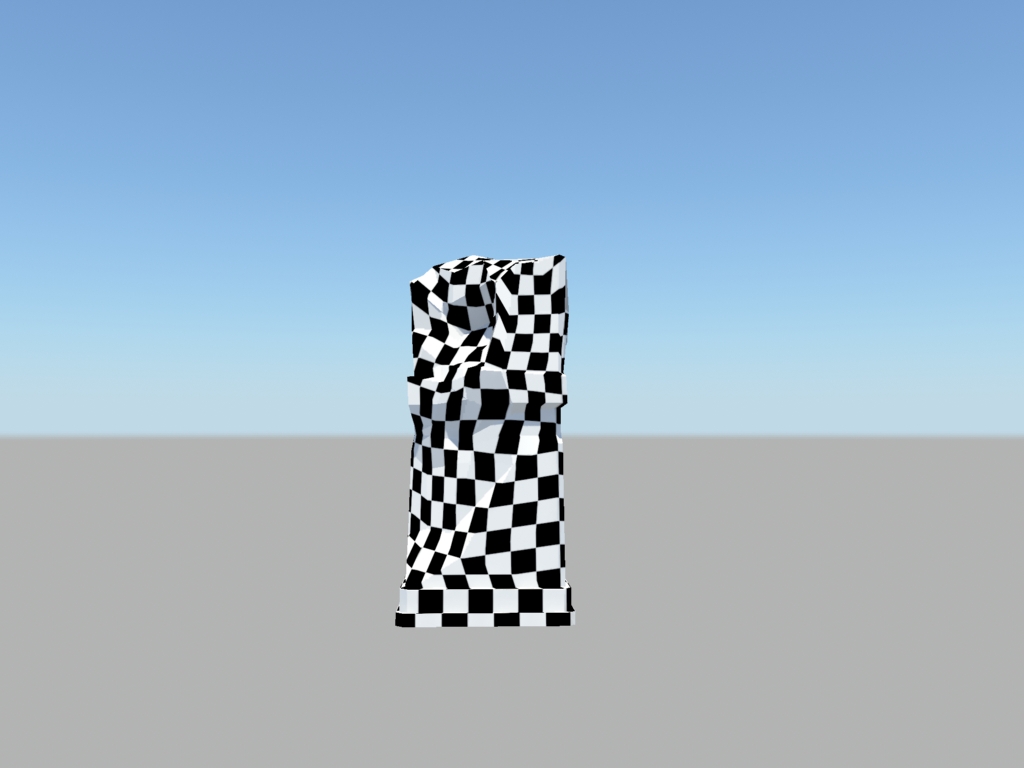
In order to map the crumbled part of the pillar I used a planar map projection from my camera perspective. Here is a before and after shot of the checker pattern. The first is before I had mapped it at all, and as you can see it is all over the place. The second is once I had mapped it using my camera perspective where all I had to do was point my camera towards the crumbled area and hope for a good projection; which I got :) 


All I had to do then was manipulate the UV’s in the editor to ensure that the checker pattern matched up to the rest of the pillar and didn’t cause any stretch. 

 
Overall I think the UV’s have come out nicely, I think the texture will sit well using them. The only thing I am slightly worried about is the top section with the crumbled area. I tried 2 different methods of UV’s, one where I sewed the edges from the top of the pillar to the cracked area and one where I didn’t. I will have to run these past a tutor before I begin texturing just to see what works best or if I need to re work any of them. Over all I am happy with the way I have laid them out! 

 
Un Wrapping the UV’s for the Vine

I suspected that the vines would need similar treatment to in terms of UV unwrapping to the rope on the bridge. However, I thought it might be less hassle considering I didn’t use a CV curve to create them, nor are they high poly. I was pretty wrong. For some reason the cylindrical mapping wouldn’t work, I can only presume because the shapes are organic and not simply cylinders. However, the unfold and relax UV tool didn’t seem to help (at first) either so I had to manually select small groups of similar faces (i.e. the ones that looked most cylindrical) and map those. Then, once that was done, id have to go into the UV editor and sew the edges together to ensure I didn’t have lots of nasty seams. 

I still need to show my tutor the vines and ropes to see if I *can* actually separate the Uvs to get more detail and still avoid seams, I have left them all together for now. 

 
As you can see, in every capture I have a new small selection of faces selected and cylindrical map them as I go along. On the right of each screen is the UV editor and you can see how the UV’s *should* appear, but sometimes they didn’t, it was incredibly frustrating. 
 
Eventually I got all of the vine cylindrically mapped and got all the UV’s laid out together in the editor. 


From here I had to manually select edges in the editor, ensure they matched and then sew the edges together to make sure that the checker pattern flowed properly along the vine. I would often find id have to cut faces and re sew them on different sides. Whilst this is probably an unconventional workflow for UV’s I find that I am learning A LOT and really getting used to using the basic tools so it’s not all bad!! ;)  

Here is the vine once I had played around with the UV’s in the editor having sewn them together. I am happy with them for now, but I think they (like the ropes) will need a bit of tweaking when I get to texture them! 

 
Un Wrapping the UV’s on the 2nd Pillar

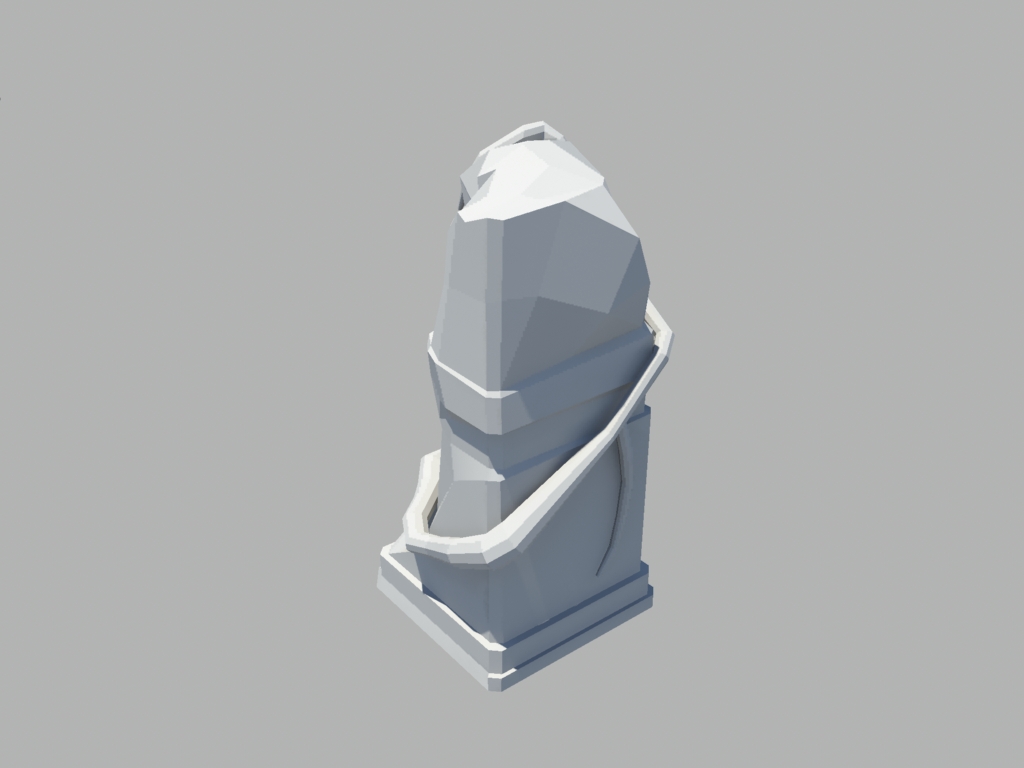
To un wrap the second pillar I followed the exact same process as I did for the first pillar, selecting faces that follow the same axis and planar mapping them. I had to be more careful when selecting the aces this time however because so much of the pillar is cracked and broken that a lot of faces could be depicted on similar axis’ so I was quite particular what faces I chose for which planar projection. 


Then I repeated the process for the opposite faces. 

 
Once I had planar mapped all the main faces I could manually alter the UV’s in the editor so that the checker pattern was equal and not showing any stretch.

 
After that it was just a case of sewing up the main parts to ensure a neat seamless checker pattern around the entire pillar wherever possible. 

 
Using the planar projection through perspective I was able to select the cracked/crumbled faces and un wrap them to the best of my ability. 

 
I then used a mixture of manual manipulation alongside the relax and unfold tool to attach the section onto the rest of the un wrapped net.  There are still areas that aren’t quite perfect and there is also a seam at the top which I might have to alter when I texture but for now I am happy :D 

 
After writing this I went back to looking at the UV’s and there are still areas that definitely need work but right now I am very tired and I need to call it a night on this particular section. So, here they are, not perfect but getting there :) 


BA6 | Specialism #12


Asset #4 - Vines

I have had the idea of wrapping vine around one of my assets since I began the project; as usual though it was just a case of finding somewhere to fit it in. Luckily I settled on an idea, this was to wrap vines around the broken pillars to emphasise their abandonment in the environment and that nature is taking over. As always I have found some visual references for wrapped vines in real life (and some can even be seen in previous reference images I have posted) so that I can have a better understanding on how these vines should appear aesthetically. 


Applying Vines to my Pillars

I moved onto trying to wrap vines around my pillars and thinking of all the possible ways I could achieve the desired look. I started the same way I made the rope which was by using the CV curve tool to literally draw out the curve of the wrapped vine. As you can see, I went into the top perspective and drew out the control verts for the vine wrap in a spiral. 


I then used the side view port and perspective view in order to manually pull the control vets down so that the spiral for the wrapped vine would progress downwards.

 
I think used the main perspective view to further manipulate the verts. My thought train was that I needed to get the spiral to flow downwards but still maintain its circular motion in order to be placed around the pillar is if being wrapped. Either way, I then created a polygonal cylinder and placed it just above the top of the CV curve/vine spiral I had just manipulated. 


I then selected the faces of the cylinder that faced the spiral, held shift and selected the curve second. I then extruded the faces along the curve and bumped up the sub divisions so that they actually followed the curve.

 
Whilst it all went to plan and I got a spiral curve, it just wasn’t the kind of look I was going for. Sure, I could have further manipulated the verts but this isn't a very quick method of working when I could just use the cylinder and extrude the faces around the pillar. Why didn’t I do that first then, I hear you ask. Well, I thought it might look a little rigid and I thought I would do a tried and tested method for creating a smooth curve first as this is the method I used for the ropes on the bridge too and they worked.  

It was upon thinking about how similar the workflow was to the rope that I realised that this vine wrap has a lot curved faces, something took me AGES to un wrap (uv wise) for the rope. I do not have the time to do that again for these vines. 
 
I then decided to have a crack at modeling the vines using the polygonal cylinder but extruding the faces to wrap manually around the pillar instead.  
 

As you can see the vine gradually wraps around the pillar as I extrude the faces and manipulate the verts to give it a more organic shape. Not only this but the number of ploys is reduced because its not a deadly smooth curve; which I actually think works A LOT better. 

I then started to do a small extra vine sticking out of the one I first created just to make it more organic and believable. 


 Asset #4 (Vine #1) Render

 
Asset #4 (Vine #2) Renders

I moved onto designing a vine to wrap around the smaller pillar too but obviously focussed on trying to not make them look exactly the same. I’m happy with the outcome of this vine too :D I followed the exact same modeling method as I did for the previous vine (cylinder > extrude face > rotate verts > rinse and repeat). 


BA6 | Specialism #11

Asset #3 - Severely Cracked 2nd Pillar

After building the first pillar with the small crack at the top I wanted to continue practicing with extruding edges and poly plane creation. I was learning how to truly make some organic shapes with this method. There are areas where I have used tri’s which I must run by my tutor as although I was told tri’s are fine, it does throw the topology off so this is something I need to consider.

I want the environment to be an old jungle temple, something that isn’t preserved (like  most of the videos of jungle temples that I found during my research) and therefore these kinds of the assets wouldn’t be kept preserved or re built, if this pillar was broken or cracked there is no one there to fix it. This goes in theme with the bridge which has broken rope handles and wonky misshaped/missing planks.

I started by extracting the area of the original pillar I wanted to recreate, duplicating it, then combining the original pillar back together. I thin used the split polygon tool draw where I wanted the crack to be on the pillar. 


Then I deleted the faces to get a better idea of the depth of the hole I could create. 


Then I would begin to select edges and extrude them, keeping a firm eye on the kind of organic shape I was creating as I went along. 

  
Final (Mental Ray) Renders of Asset #3 - The Severely Cracked Pillar

I’m so happy with the way this came out! I cant wait to start texturing it! :D

Sunday, 21 April 2013

BA6 | Specialism #10


Temple Pillar | Part 1

Okay so in my last post I showed you all the research into visual influences/inspirations and references that I found. Unfortunately I began modeling and nothing seemed to look “right”, I wasn’t conveying the correct a3esthetics in my environment. I started one rather rocky pillar which I must admit I was trying to do from my imagination and it just didn’t look right. I then went back to my research and picked out the pillars that I felt inspired by the most and tried to find a balance between them visually so that I could combine them together and create my own pillar. I began a second pillar but felt that it wasn’t organic enough to fit in with my scene, even though it looks pretty much identical to one of the pillars in my photographic visual references of jungle temples/ruins. So, I began another one, again trying to balance reference material and imagination in the hope that once combined the model would look right.

Temple Pillar Attempt #1


I then began the second pillar which was more simple in structure; just like the ones in the real life photographs in my visual references. Mainly a tall rectangle with simple extruded stone areas for shape and clarity. I began this model but still it just didn’t feel right, nor did it stick with my “trying to do organic modeling” agreement.

Temple Pillar Attempt #2


At this point I was thinking of ways to keep the model true to the reference images I had gathered because that was the reason I found them, but also trying to consider how on earth I would make this basic extruded model look organic and personal.

Temple Pillar Attempt #3

I decided to start over once again but this time make the shape a little fatter so that the overall pillar would look like a basic extruded square. I added a small bevel to the edges of the extruded shape and began to add in edge loops so that I could extrude areas of detail. 

It was at this point I STILL wasn’t happy but realised what I wanted to achieve. I wanted to make a massive cracked area where rock would have chipped away. This would test both my modeling skills and add a personal aesthetic to the model overall. I began using the split polygon and cut face tool to literally draw out where I wanted the crack to be. 

 
I then simply deleted these faces. To begin filling up the newly created hole in my model and ensure that it wasn’t just a flat plane which filled it, I started selecting edges and extruding them, reshaping and editing them as I went along so that they all began to meet in the middle. 


I would then simply select the verts and merge them together so that the newly created faces started to form the cracked part of the rock. 

 
All I had to do was keep extruding edges and merging verts as I continued to poly plane model the rest of the cracked area of the pillar. I did have to use the split polygon tool sometimes to correct some faces which didn’t have proper geometry. 

When the edges all pretty much met in the middle, I decided to use the fill hole to fill the small part (this didn’t alter the geometry of the cracked pillar as it was a small area). I then used the split polygon tool to finish adding the edges to model the final areas of the crack.


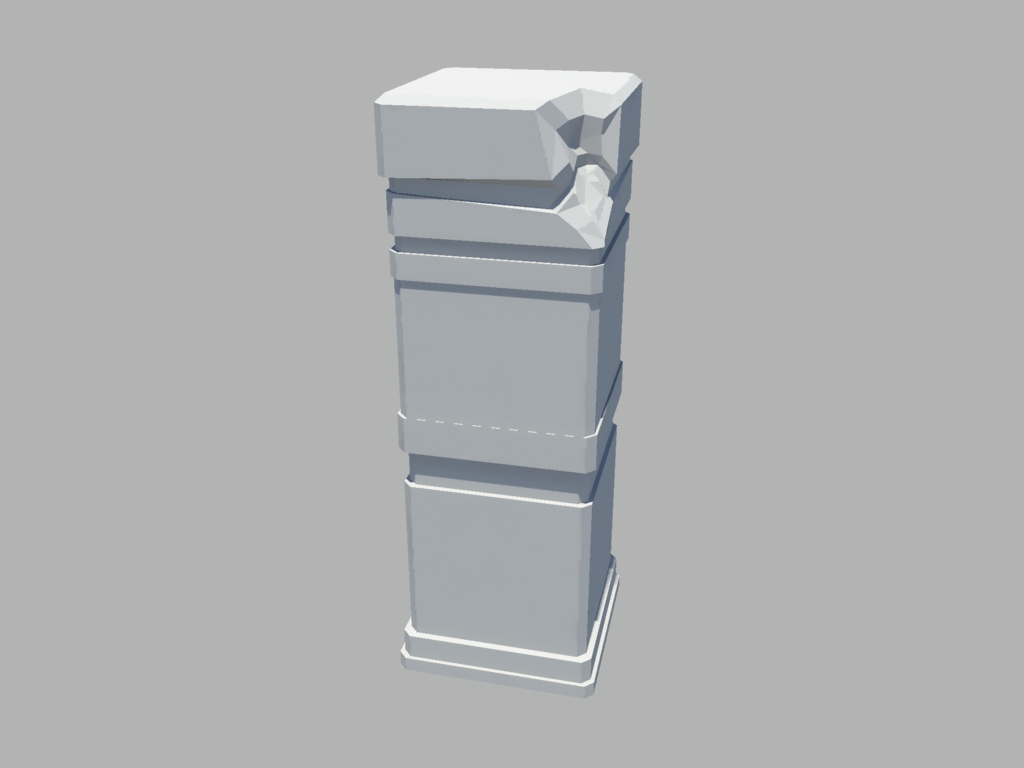
…and ta-daaa! The final outcome. One nice cracked away pillar looking lovely and organic ;)


Final Pillar (I think!)

I say “I think” because I am hoping the textures I apply to this pillar will help the rest look organic and real. I want to polish it off really nicely. However, I may have to add more cracked areas in terms of modeling. I will see how it goes, for now I will say it’s “done”.