Asset #7 - Temple
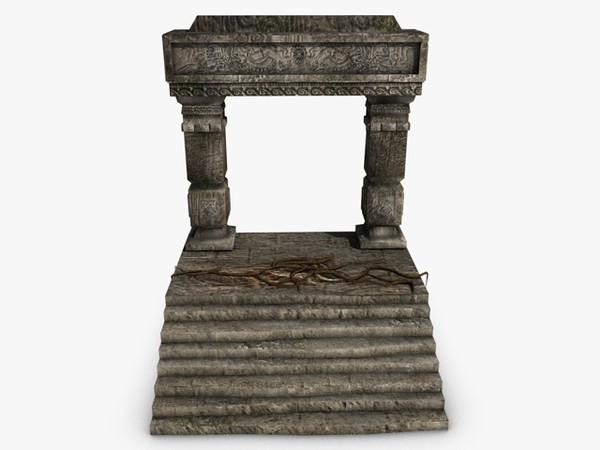
Stairs
With the deadline just round the corner
I don’t want to bite off more than I can chew…even though I kind of already
have!! Haha. I'm going to build some temple stairs, just a few steps that are
made of crumbled old stone with broken side walls. The wont be a fully modeled
set of stairs, I will break them off before they reach the temple. I am hoping
this will bring the scene together a bit more as right now it feels a bit lost
:( As always, here are a load of visual images I have found to help me model my
stairs.
Building Asset #7 -
The Stairs
The stairs were really simple to build
and make look organic. I built a basic stair formation like so…Sure, it looks
like a lot of unnecessary edges at this stage but I needed them to emphasise
the organic aesthetic. Plus I went onto tidying them up.
Using a mixture of extrusions on
certain faces inwards and outwards plus manipulation of the vert placements I
was able to create a set of stairs that looked organic and similar to those
seen in my reference images. I wanted them to look rugged and misshapen, whilst
they are temple stairs they are also in a jungle which isn’t supposed to be
maintained by people everyday so they will become weathered and damaged.
Asset #8 -
Boulder/Rocks
I knew that I wanted to create some
rocks for my environment but didn’t really have a clear vision on where or how
to incorporate them into my environment other than “hey look, a rock. Look how
it’s just randomly sitting here…great”. I will admit that with the hollow log
and tree stump I was headed this way with my assets under the impression that
the bridge and pillars were going to be the focal point of the environment.
This led my other assets to look a little lost and I knew I needed something to
pull the environment together! Especially before I started to build things for
the sake of building.
SO! Enter rocks with purpose!! :D I
built the stairs and felt inspired by a model that I found whilst doing visual
research for the stairs. The stairs had a rock formation around them and led up
to a doorway/pathway. I thought to myself I could try to re create something
similar. I began to build some basic rocks, experimenting with a new tool that
I had wanted to use for ages called the lattice.
First of all I did a bit of research
into rock formations in a jungle environment. Ultimately it will be the texture
that makes these large rocks look how they should so it was crucial I found
images of rocks in the right place. Had I of researched rocks from a
dessert I wouldn’t be getting the right impressions of the textures a rock from
a jungle needs. Here are the inspirations and visual references I found which I
feel give me a pretty good idea of how jungle rocks should be.
I didn’t really document or capture
much of the development of the rocks as they started off as a trial/experiment.
I
started off building a rock that had a large crack in the middle. I also used
the lattice tool in order to duplicate the same rock but manipulate its shape
whilst keeping the geometry correct.
I never kept this rock which is why I
didn’t document any more of its creation. The rock worked as a small rock as
once enlarged to the scale to frame the stairs the crack became far too out of
proportion, plus I was worried that including the crack would cause more
problems later on when texturing as I already feel I have bitten off more than
I can chew, I'm trying hard to add to my workload so that I can maintain a high
quality. Therefore, this rock got binned haha.
I ended up reverting to a previous save
where I had the rock shown above, but before I had created the crack. I then
used a series of extra edge loops, vert manipulation and re size tools to
enlarge the rock formations into a rough outline/mock up of what the scene
might look like with large rocks. Here
is the WIP as it stood when I was testing out blocks to see how it would look.
I then began adding in more detail to
the rock to achieve a look that I liked.
I also manipulated the stairs so that
they fit in between the rocks. I want them to be as if they come out for the
rock or at least blend in.
Current Stage
At this stage the rock formations need
a little more work but not loads, I don’t want to up the polys anymore really! The
stairs also need to actually go somewhere; not just end suddenly on the other
side! From feedback I have been advised that maybe I should just b ring the
stairs down again on the other side just to finish it off so this is something I
will probably do :D Here are my current WIP shots though.
Oh yeah, I also added in polygon planes
which I intend to texture with a floor as feedback suggested to me that my
bridge didn’t read well as a bridge because everything was “floating” so I am
hoping this will help. My main goal is to texture the assets though.