Jungle
Rope Bridge | Part 1
Now that I am
becoming more confident in my ability in Maya I don’t find the need to document
every little move that I make in a step by step guide because most of the
progression elements are very basic to me now.
This is not to
say I haven't had any problems to overcome in the modeling of the bridge so
far. I have been thinking about how to make the rope, do I create properly modeled rope with
ridges and twist or do I simply create an extruded cylinder and ensure the rope
texture applied is seamless and high quality? I decided that I would have a
crack at modeling actual rope. I didn’t really know where to start so I went
online to find help which is when I came across multiple tutorials, however a
lot of them said they throw your polycount through the roof or are simply a
pain to UV and texture. I came across a post on a forum with images of how to
create some basic rope which I followed and worked quite well. Here is how I
achieved the effect.
First of all,
I created a “nurb circle” with 12 control vertices (see under “sections” on the
options menu on the left).

Then I
selected these specific vertices…

…and then I
moved them all inwards to the center. The remaining control points around the
edges just needed altering so that in the end I was left with a 3 leaf clover
look.

After this I
selected the CV curve tool and drew a ring which is the path I wanted my rope
to take. This was going to leave me with a ring of rope.

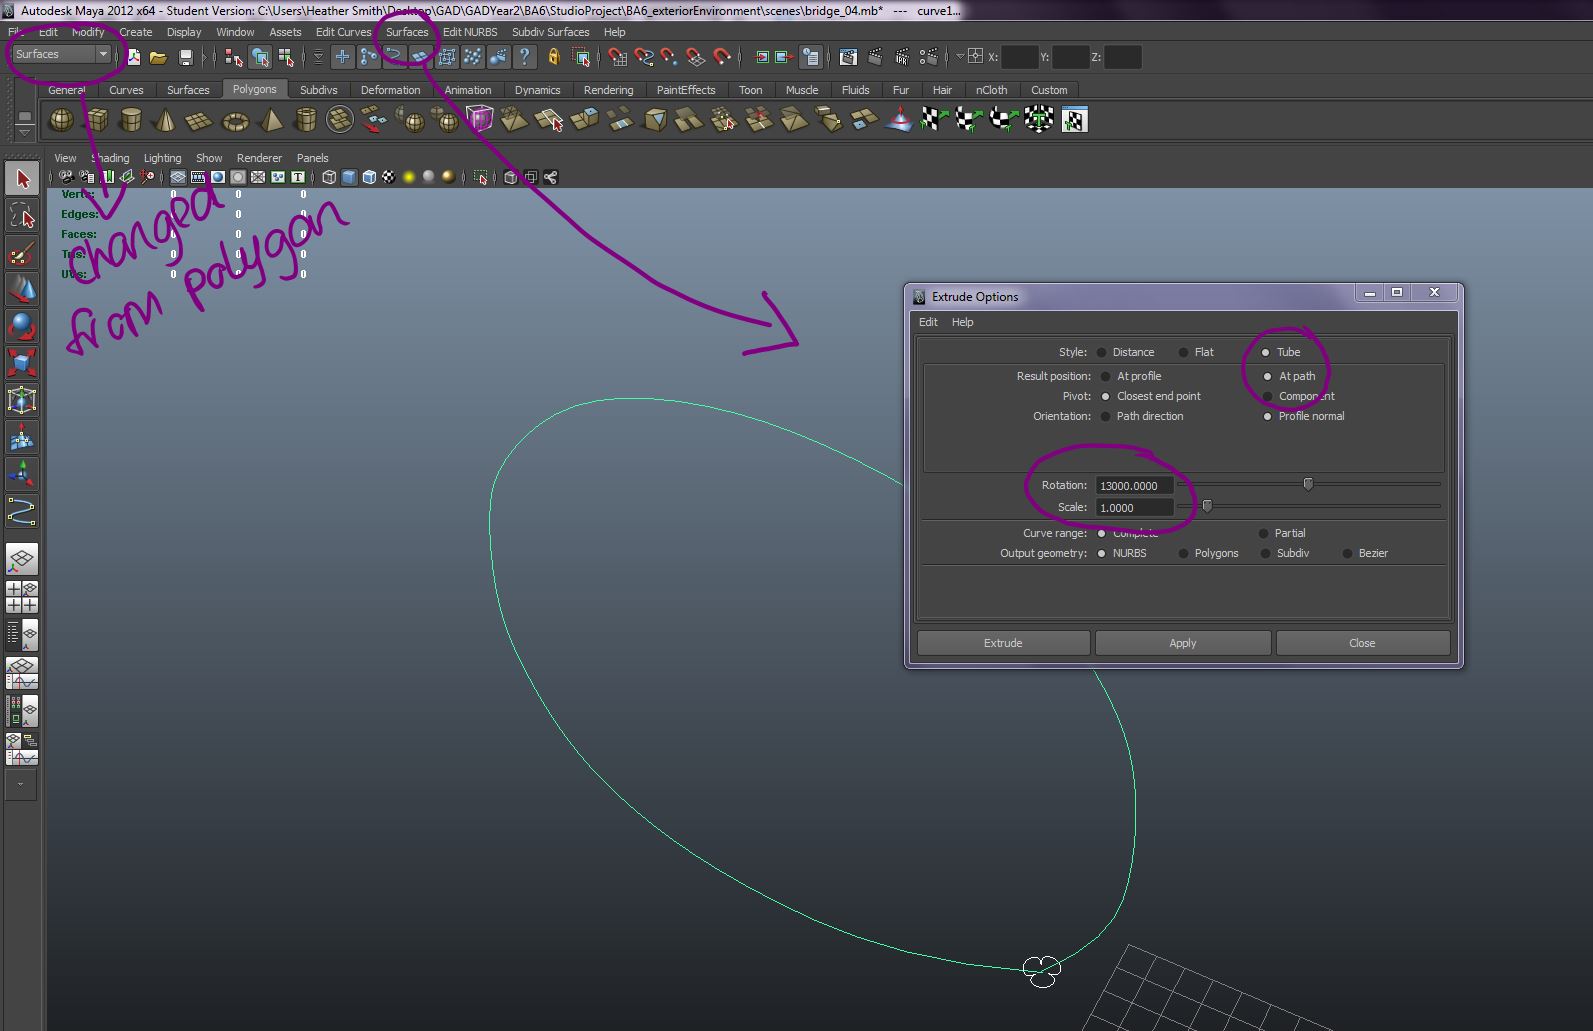
In order to
add the twist to the nurb circle I created I needed to change my drop down shelf
from polygons to surface > then select surface from the options at the top
of Maya > drop down to extrude and select the option box > edit options
like below.
Once extruded
I was left with this 3 tier twisted rope shape.

The only
problem was the incredibly high poly count. For a basic loop shape rope (of
which I would need to duplicate many times for my bridge design) it eats a
large chunk of a poly budget. Even though I am not particularly worrying over a
poly budget for this project I am still having to be reasonable and this just
isn't suitable. Still, the point is that I made it and it was a success :D So,
that’s the main thing ;)
Rope Bridge
WIP Renders
Okay so like I
said previously, I haven’t kept step by step screenshots because this model has
been fairly straight forward (in terms of my knowledge and lack of guide
needed) to create. Following my design I have tried to ensure that the model is
really organic. A lot of the visual influences I found used wooden posts which
were simply basic polygon primitive spheres and cylinders to create the rope
wrapped around them. I have used a similar method for the rope however my
wooden posts have more of an organic shape to them instead of a simple
“perfect” cylinder as this is a main focus for my project; creating organic
models.


Jack Eastoe showed me
this really cool effect that you can achieve when you export your Maya model as
an FBX into 3DS Max. It basically creates an almost cell shaded aesthetic and I
thought it looked really awesome so I did it to my model too :’)

No comments:
Post a Comment