Temple Pillar | Part 1
Okay so in my last post I showed you
all the research into visual influences/inspirations and references that I
found. Unfortunately I began modeling and nothing seemed to look “right”, I wasn’t
conveying the correct a3esthetics in my environment. I started one rather rocky
pillar which I must admit I was trying to do from my imagination and it just
didn’t look right. I then went back to my research and picked out the pillars
that I felt inspired by the most and tried to find a balance between them
visually so that I could combine them together and create my own pillar. I
began a second pillar but felt that it wasn’t organic enough to fit in with my
scene, even though it looks pretty much identical to one of the pillars in my
photographic visual references of jungle temples/ruins. So, I began another
one, again trying to balance reference material and imagination in the hope
that once combined the model would look right.
Temple Pillar Attempt #1


I then began the second pillar which
was more simple in structure; just like the ones in the real life
photographs in my visual references. Mainly a tall rectangle with simple
extruded stone areas for shape and clarity. I began this model but still it
just didn’t feel right, nor did it stick with my “trying to do organic
modeling” agreement.
Temple Pillar Attempt
#2

At this point I was thinking of ways to
keep the model true to the reference images I had gathered because that was the
reason I found them, but also trying to consider how on earth I would make this
basic extruded model look organic and personal.
Temple Pillar Attempt
#3
I decided to start over once again but
this time make the shape a little fatter so that the overall pillar would look
like a basic extruded square. I added a small bevel to the edges of the
extruded shape and began to add in edge loops so that I could extrude areas of
detail.
It was at this point I STILL wasn’t
happy but realised what I wanted to achieve. I wanted to make a massive cracked
area where rock would have chipped away. This would test both my modeling
skills and add a personal aesthetic to the model overall. I began using the
split polygon and cut face tool to literally draw out where I wanted the crack
to be.

I then simply deleted these faces. To
begin filling up the newly created hole in my model and ensure that it wasn’t
just a flat plane which filled it, I started selecting edges and extruding
them, reshaping and editing them as I went along so that they all began to meet
in the middle.

I would then simply select the verts
and merge them together so that the newly created faces started to form the
cracked part of the rock.

All I had to do was keep extruding
edges and merging verts as I continued to poly plane model the rest of the
cracked area of the pillar. I did have to use the split polygon tool sometimes
to correct some faces which didn’t have proper geometry.
When the edges all pretty much met in
the middle, I decided to use the fill hole to fill the small part (this didn’t
alter the geometry of the cracked pillar as it was a small area). I then used
the split polygon tool to finish adding the edges to model the final areas of
the crack.

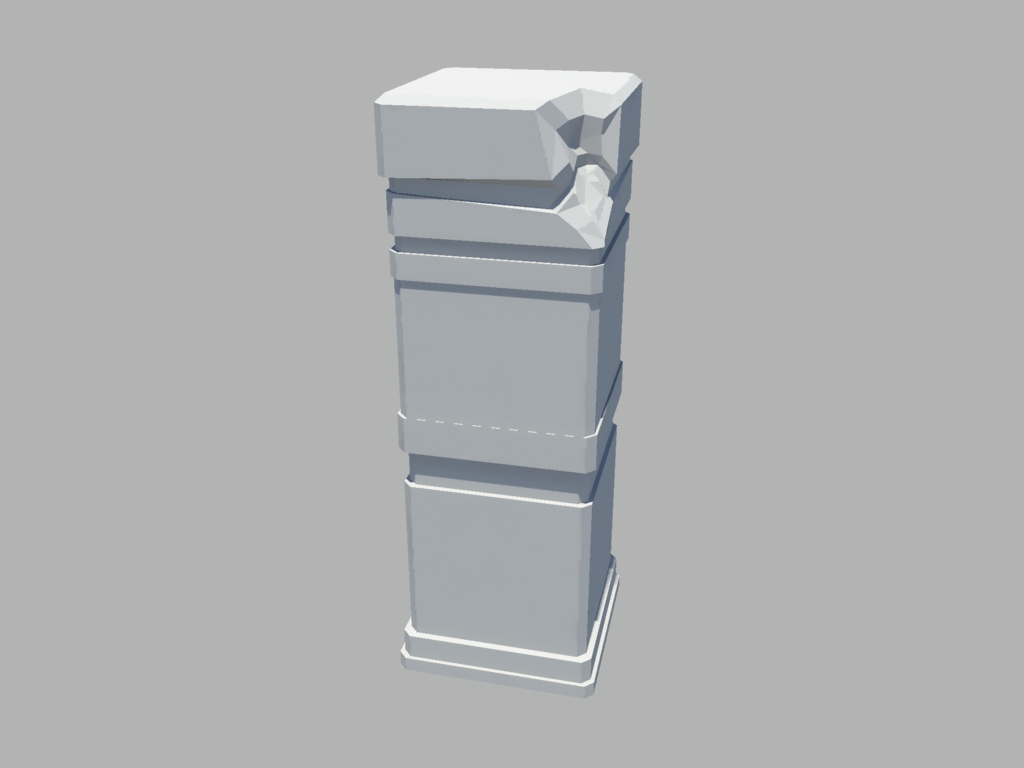
…and ta-daaa! The final outcome.
One nice cracked away pillar looking lovely and organic ;)

Final Pillar (I
think!)
I say “I think” because I am hoping the
textures I apply to this pillar will help the rest look organic and real. I
want to polish it off really nicely. However, I may have to add more cracked
areas in terms of modeling. I will see how it goes, for now I will say it’s
“done”.


No comments:
Post a Comment